Showing posts with label DIY. Show all posts

Monday, August 4, 2014

Mutiny Against Excess Week 9- Baby Food Edition


For week 9 I tackled a different area other than clothes and possessions. Baby food making isn't something new for me. I have actually done it to some extent with all three kids so far. It's something that I really enjoy doing and doesn't cost me a dime. 

I think this falls more in the categories of waste and food when touching on the amount of excess in my life. 
It is so nice that I don't have my cabinets full of glass baby food jars. When we moved into our current house I lost my pantry. There is no way I would be able to cram all of my stuff into my cabinets with jars in the way. It's also nice that I know exactly what is in the baby food that I'm making--veggies and water!

I'll start the post in one of my favorite places
my Dad's garden


This is where the free part of this comes in. I know it would cost a lot more if I actually had to buy the veggies, but my parents are pretty awesome and grow all this stuff so that my siblings and I can enjoy it.

For this post I made green beans and squash


Everything had to picked, but due to our unseasonably cool temps for July, it made picking a breeze

I brought the beans and squash home and washed them in the sink
Dad does his best to keep from spraying the veggies with any chemicals, so I know these are going to be pretty healthy and pesticide free

Next, I cut the squash up and snapped the green beans and steamed them in my steamer pot


After that I added them to my small blender along with some of the water from the steamer


Once they were pureed I put them into ice cube trays to freeze


Each serving is about 1 oz.

Once they freeze, I pop them out into ziplock bags and throw them in the freezer. 


They usually last about 6 months in the freezer, so I should have all I need until she starts eating more table food.

Tuesday, March 18, 2014

Our New Homeschool Room

We made a few adjustments to our playroom/homeschool room. I love having a dedicated space for all of our books, worksheets, marker boards etc. We had a small table and large club chair in the room before. I liked having a comfortable place to sit, but it wasn't working. The table was too small for both Jackson and Ava to work on. I also knew we would need even more space as Emma gets older. 


We had two book shelves on either side of the window wood piece on top to tie it all together. We decided to move the bookshelves to the corners and use the wooden piece as a desk in between.

A few months ago we also put up a chalk board wall  on the other side of the room

This is my new organizer from Thirty-One. It's been pretty perfect to separate our papers out of the week, display some of Jackson's work and keep our scissors, pencils and glue handy. If you want one let me know. I can put you in touch with my sister who is a Thirty-One consultant.


I plan on putting a calendar, sight words and seasons on the tack board. I bought a laminator today. I can't wait to start creating things with that. There's a whole new world of possibilities for chore charts, mazes and so many other things! I may be a little bit of a nerd.


Thursday, March 6, 2014

DIY Laundry Detergent

Here are the ingredients: (Baking Soda not pictured)
1 cup Washing Soda
1/2 cup Borax
1 bar Fels Naptha soap
1/2 cup Baking Soda (not pictured)
3 gallons of  warm water

First, I put about 4 cups of water into a pan and got it boiling

Next, I grated the soap with a cheese grater

I added the soap to the pan little by little until it was dissolved.

I put the 3 gallons of warm water in a 5 gallon bucket.

Add the soap mixture, washing soda, baking soda and Borax

Stir until mixture blends together

Let cool for 24 hours

Mine turned out pretty much the same consistency of regular detergent.


I washed a load of clothes in it and they didn't have a scent necessarily, just a clean smell.


 All in all it cost about $7 for all the ingredients that I can make several more batches from. The only thing that has to be bought every time is a $1 bar of Fels Naptha soap. I'm also planning on putting together a few more cleaning products from the baking soda and borax.

Wednesday, February 5, 2014

Valentine's Day Craft Project

I'm so happy to be home with the kids so much this semester. We have been doing preschool with Jackson and he seems to be doing great. We are really learning on counting and letter recognition. But of course, since he's a 4 year old boy we need to have plenty of play and craft time. I have a whole list of Valentine activities that I want to do. Here is the first one we tried.


I had some 12 x 12 canvases left over from a project I did awhile back. I used Jackson and Ava's hands for the 'O', and then I used Emma's foot to make the 'V' in hers. I wanted to use her hand too, but it was too hard to get her to spread her fingers out. I was really happy with the way it turned out, and Ava only licked her paintbrush twice, so I consider that a success :-)

Wednesday, May 1, 2013

Decorating

I have had some decorating ideas in mind for awhile now. They involved old doors and pallets. If you've been paying attention to the latest home decor fashions, you know that doors and pallets are a hot commodity these days. 

A few weeks ago I was walking in my neighborhood and noticed someone throwing out an old pallet and some fence panels. I went back the next morning and loaded the pallet and a few of the old boards up in my van.


I ended up cutting the pallet in half , turning them on their sides and nailing an old fence board to the top.

I wanted to hang them on the wall to hang pictures in.
Here is how it turned out:


The next thing I wanted to do was make a headboard out of some fabulous doors I found at my husband's grandparent's house.

The doors didn't require much work. I just cleaned them up and then sanded them to scuff them up a bit.

I'm pretty happy with the way all this turned out, especially since it was all free!

Monday, April 1, 2013

Coffee Table Redo

I've been on a furniture redo-ing kick for the last month. I love finding pieces of furniture (that have seen better days) and making them into something new and modern. A few weeks ago I finished my dining room table. I was so excited with how it turned out.

I have been looking for an oval coffee table for a few months now. We had an ottoman that took up a lot of space in our living room, and I wanted something a little smaller. I was hoping for an oval table because I didn't want any sharp edges around while Ava is learning to walk. I also love how different these tables look. My sister was able to find a solid maple table for $25 for me.

I forgot to take a before picture, but my husband said he thought it was the ugliest coffee table he had ever seen. It was in great shape, it just looked like it jumped right out of 1978. I couldn't wait to get started and make it into something that would fit our living room perfectly.

I wanted to try to paint it a fun color, but I couldn't decided. I never really felt like any color would go well with everything we have in our living room, so...

This is what I came up with. I decided to re-stain the top in the same dark walnut that I used on my dining room table. I painted the bottom white, sanded it to scuff it up a bit and then rubbed stain over the top of it to give it a shabby look. I thought I might change the hardware, but after I was finished I thought the old stuff looked great!

I was really happy with how this project turned out, and it only took me 1 night to complete it.

Monday, March 18, 2013

Kitchen Table Redo


This was my dining room table in November
It has been in my family for 27 years. I acquired it about  four years ago from my sister when we moved into our first house. It was in desperate need of refinishing, but I was a little afraid of the task. Since I've been remodeling my kitchen since we moved in I thought I would tackle this too.

I sanded it all down with a sanding block. I decided to go with a dark walnut stain for the top of the table and chairs, and an antique white for the pedestal of the table and chair legs. I stained the table top and seats/ spindles of the chairs. They got about 3 coats of polyurethane when the stain dried.

The pedestal and chair legs I did a shabby finish on. I roughly painted them with white paint (making sure to leave some wood showing through), and then rubbed on stain and wiped some of it off. I put a few coats of poly on the paint when it dried.


This is what it looks like now


I'm so happy with the results and it didn't take near as long as I expected.

Saturday, January 5, 2013

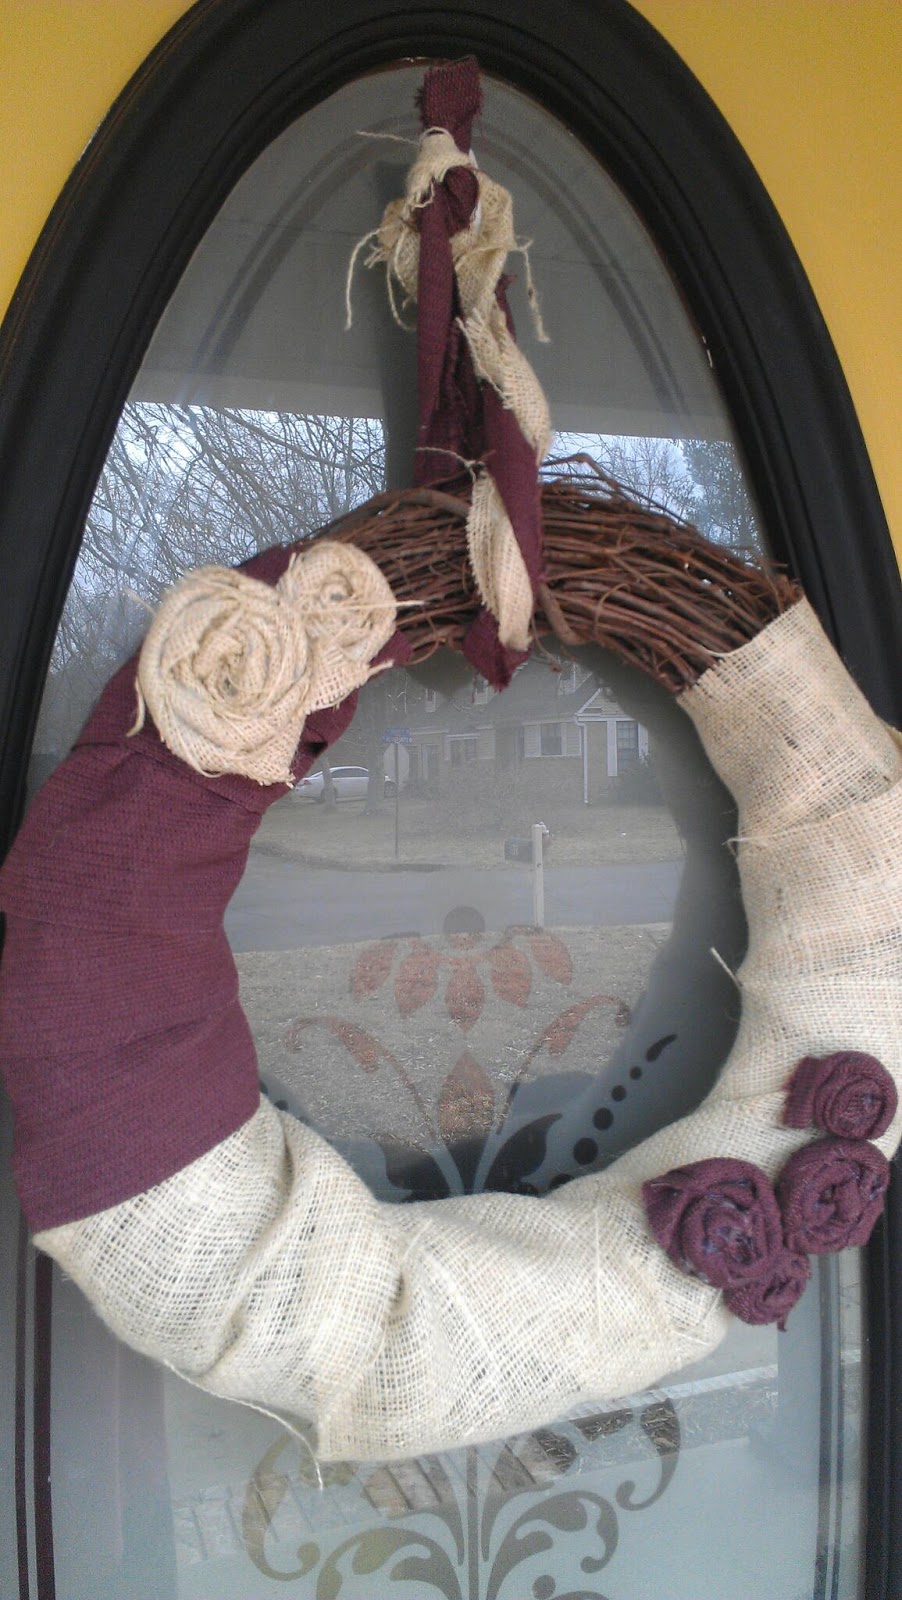
Burlap Wreath

I found a great deal on burlap at Hancock's a few weeks ago. I didn't really know what I was going to do with it, but I knew I would find something. I also bought some course purple fabric and I liked they way they looked together. I had an old grape vine wreath that was in desperate need of a redo.


I cut the burlap down the side to make one long strip. I hot glued the end of it on to the back of the wreath and started wrapping it around.


I wrapped a little less than 1/2 of the wreath in the burlap. I did the same thing with the purple but left a spot open at the top with nothing on it.

Next, I made the flowers. Start by taking a strip of fabric and twisting it. Then, start wrapping it around itself in a circle, hot gluing all the way around.


This is a finished burlap flower. I made a few burlap and also some of the purple fabric


To hang it I took some of each fabric, twisted it and wrapped it around the wreath.
This is the finished product. I love the way it turned out.


This is a pretty simple DIY wreath that doesn't cost much.

With love,

Tuesday, November 13, 2012

(Another) Kitchen Redo

Some (my husband) calls this an affliction, however I think it's great that I love to redo things...over and over again. We bought this house 6 months ago. The counter tops were in desperate need of a renovation. Since my in-laws are awesome, and great at tiling, we decided to tile the counter tops and back splash. I also painted the walls a calming blue color. Here are the "after" results of that.


I still wasn't satisfied with everything, mainly the cabinets. I found a magazine at Lowe's that had a great idea for painting the top and bottom cabinets different color. Here are some before and after shots.

Before:

After:


Before:

After:


Before:

After:


Before:

After:


Before:

After:

And a few more after shots...


So what do you think? I still need a few accessories for the cabinets, but overall I really like it.

 
Blogging tips